PRINT-READY ARTWORK
ARTWORK
GUIDELINES.
Prepare your artwork correctly for the best possible print results. Follow these guidelines for file setup, bleed, colour, resolution and more.
BEFORE YOU START
GET YOUR ARTWORK
READY TO PRINT.
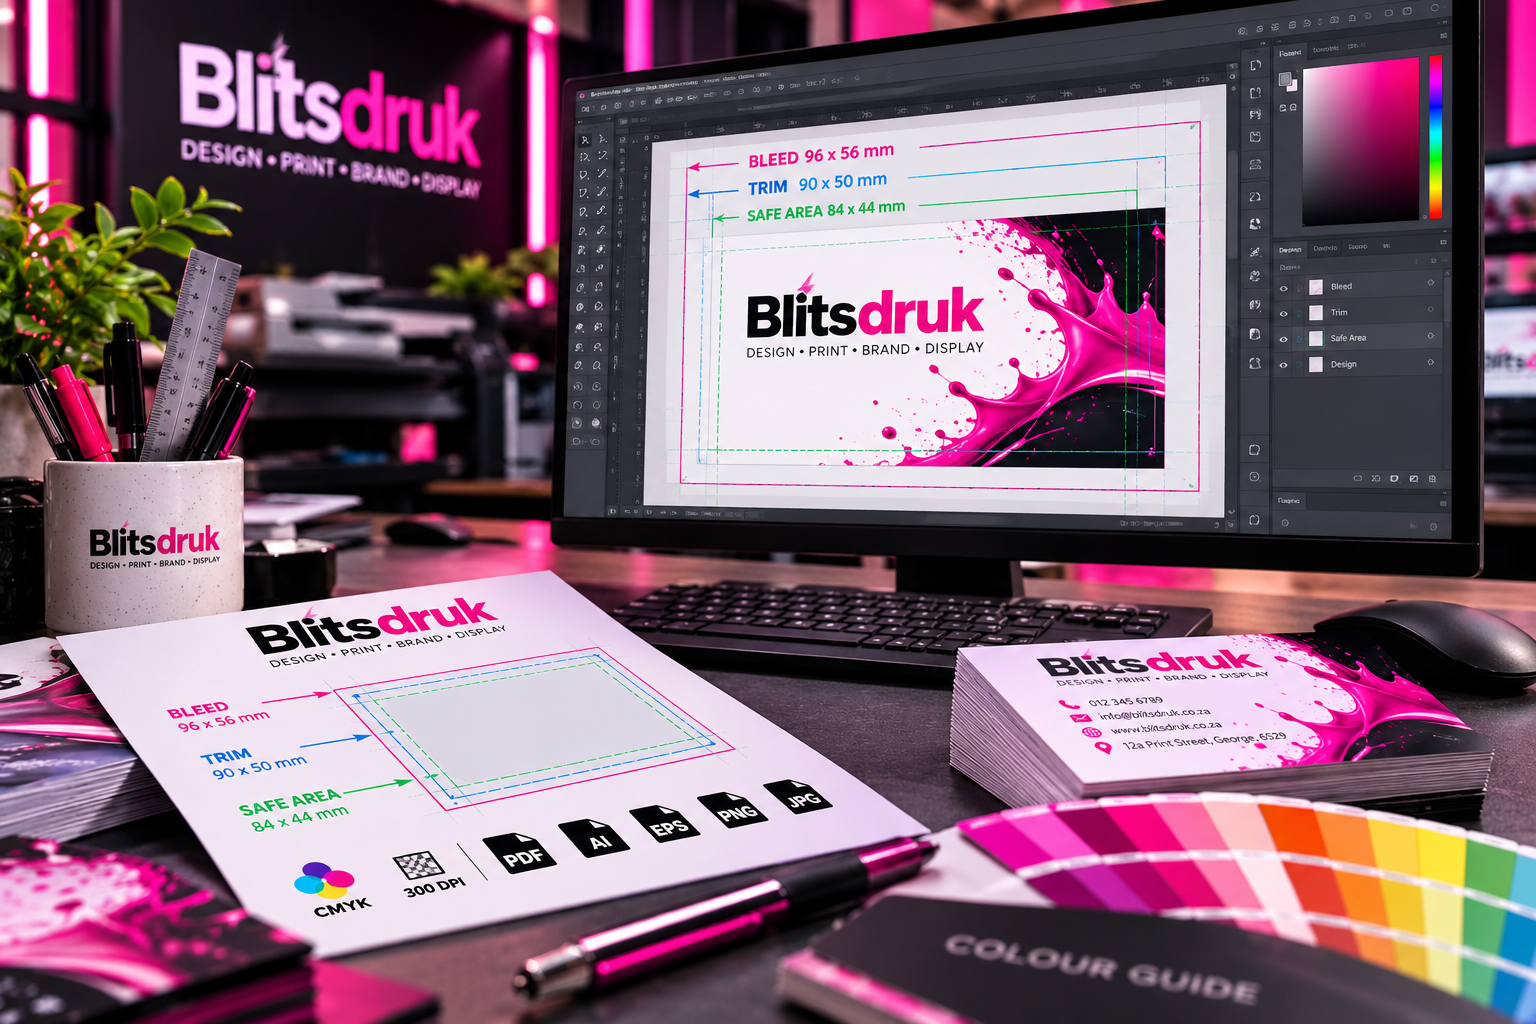
Correct artwork setup helps prevent delays and ensures the best possible print quality. Before submitting your files, check the size, bleed, safe area, resolution, colour mode and file format using the guidelines below.
FILE SETUP
SAFE AREA.
BLEED
Extend all background colours, images and design elements that touch the edge of the finished product beyond the trim line. This prevents unwanted white edges after cutting.
TRIM SIZE
This is the final finished size of your printed product. Important text and logos should not sit directly against the trim line.
SAFE AREA
Keep important text, logos and other essential information inside the safe area. This protects them from being cut off during trimming.
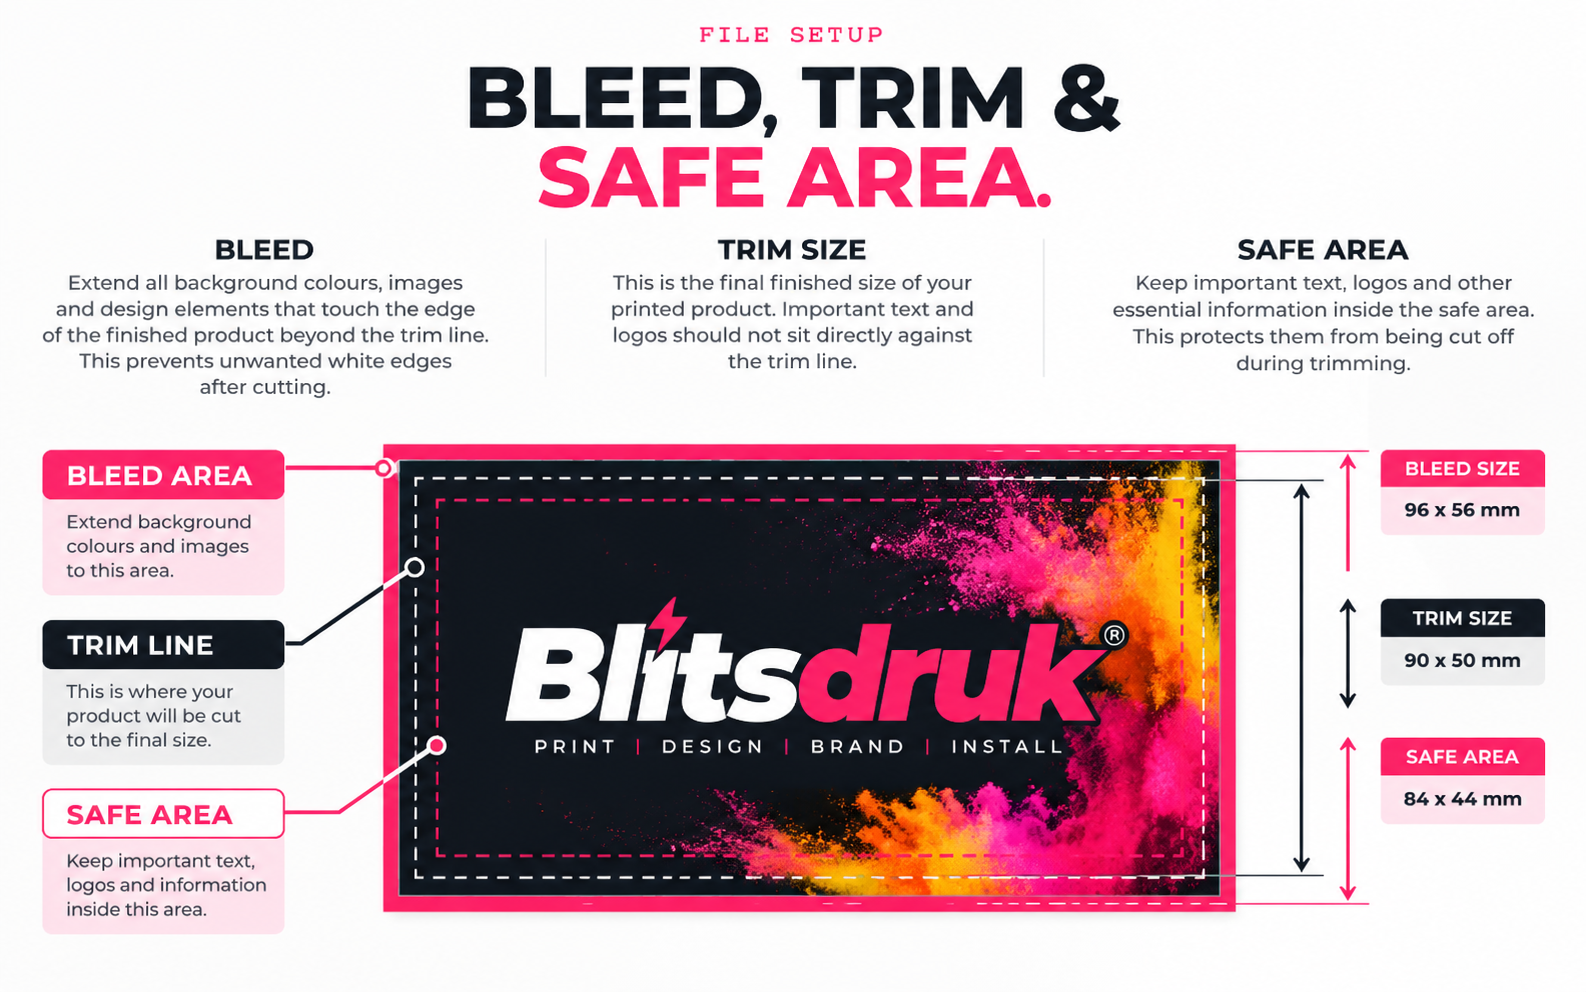
IMAGE QUALITY
IMAGE QUALITY.
300 DPI FOR PRINT
For the best print quality, supply photographs and raster artwork at 300 DPI at the final print size. Low-resolution images may appear blurry or pixelated when printed.
DESIGN AT THE CORRECT SIZE
Increasing the DPI setting of a small or low-quality image does not improve its actual quality. Wherever possible, create your artwork at the correct final size from the beginning.
LARGE FORMAT PRINTING
Large-format artwork may have different resolution requirements depending on the finished size and viewing distance. If you are unsure whether your artwork is suitable, contact Blitsdruk before submitting your order.
AI-GENERATED IMAGES
AI-generated images can produce excellent print results when they are created and prepared correctly. For Blitsdruk, we recommend AI-generated artwork for print sizes smaller than A1. Carefully check text, faces, hands, logos, fine details and other important elements for visual errors before submitting your artwork.
AI UPSCALING
AI upscaling can improve the appearance and usable size of an image, but it does not automatically make the artwork suitable for high-quality printing. The final image must still have sufficient quality and resolution for the required print size.
Please contact Blitsdruk before using AI-generated artwork so we can check whether the image quality is suitable for the required print size.
COLOUR SETUP
COLOUR &
FILE SETUP.
The correct colour setup depends on the printing process. Most standard printing artwork should be supplied in CMYK. DTF and UV DTF artwork should be supplied in RGB as PNG files. For 2- or 3-colour litho printing, artwork must be set up using the required Pantone spot colours.
ARTWORK WE CAN WORK WITH
✓ CMYK — Standard digital & general printing (.Pdf files)
✓ RGB — DTF printing (.PNG files)
✓ RGB — UV DTF printing (.PNG files)
✓ RGB — Laser cut files (Vector files)
✓ RGB — Digital Cutting & Scoring Lines (.pdf files)
✓ PANTONE — 2- or 3-colour litho printing
Using the correct colour mode helps us produce the best possible result for each printing process. If you are unsure how your artwork should be supplied, contact us before placing your order.
FONTS & TEXT
KEEP YOUR TEXT
PRINT READY.
CONVERT FONTS TO CURVES
Convert fonts to curves/outlines before supplying editable artwork. This prevents missing or substituted fonts when we open your file.
CHECK TEXT SIZE
Make sure important text is large enough to remain clear and readable when printed at the final size.
KEEP TEXT IN THE SAFE AREA
Keep names, contact details, logos and other important information safely inside the trim line.
CHECK YOUR CONTENT
Carefully check spelling, phone numbers, email addresses, dates and other information before submitting your artwork.
FILE FORMATS
SUPPLYING YOUR
ARTWORK.
Supply your artwork in the correct file format to help preserve image quality, fonts, colours and layout during production. The preferred file type depends on the printing process and how the artwork was created.
Not sure which format to use?
Send your artwork to us and we'll check whether the file is suitable for production and let you know if a different format is required.
ASK US ABOUT YOUR ARTWORK
PDF - PREFERRED FOR PRINT
For most standard printing, supply a high-quality print-ready PDF with the correct size, bleed and colour setup.
CORELDRAW & ILLUSTRATOR
Editable vector files are accepted. Convert all fonts to curves/outlines and make sure linked images are embedded before supplying the artwork.
PHOTOSHOP FILES
Photoshop files are accepted. Keep artwork at the correct final size and resolution, and include all required image and design elements in the file.
PNG — DTF & UV DTF
DTF and UV DTF artwork should be supplied as a high-resolution PNG file in RGB colour mode. Use a transparent background where the design requires it.
CANVA ARTWORK?
DESIGN IN CANVA?
EXPORT IT CORRECTLY.
Canva artwork is accepted, but it must be set up correctly for printing. Canva Free includes print bleed, so please follow the steps below before downloading and submitting your artwork.
Open your Canva design, then go to File → View settings and select Show print bleed. A dashed line will appear around your design, indicating the bleed area.
Make sure all background colours, images and design elements that need to print to the edge extend all the way to the dashed bleed line. If you see any white gaps, resize or stretch the elements until they completely cover the bleed area.
Click Share → Download and select PDF Print as the file type. Make sure Crop marks and bleed and Flatten PDF are selected, then click Download.
BEFORE YOU SUBMIT
PROBLEMS TO AVOID.
Before submitting your artwork, check for these common problems. Correcting them before production helps prevent delays, unexpected print results and the need to resupply artwork.
Avoid screenshots, images downloaded from social media or small images enlarged beyond their original size. Low-resolution images may print blurry or pixelated.
Background colours, images and design elements that print to the edge must extend beyond the trim line into the bleed area. Missing bleed may result in unwanted white edges after trimming.
Keep important text, logos and contact details inside the safe area. Elements placed too close to the trim line may be cut off or appear uncomfortably close to the finished edge.
Avoid screenshots, images downloaded from social media or small images enlarged beyond their original size. Low-resolution images may print blurry or pixelated.
Background colours, images and design elements that print to the edge must extend beyond the trim line into the bleed area. Missing bleed may result in unwanted white edges after trimming.
Keep important text, logos and contact details inside the safe area. Elements placed too close to the trim line may be cut off or appear uncomfortably close to the finished edge.
NEED HELP?
ARTWORK IS PRINT-READY?
Not sure whether your artwork meets the requirements for printing? Send your file to us and our team can check the basic setup and advise you if any changes are required before production.